
Data Integration is one of the most common task in a CRM project : be it for project initialization, integration with an ERP, with one of the many third party tools used in the company… A task I commonly needed to do in my freelance activities since many years.
We can see data integration as two categories :
- real-time integration : usually using techniques like web-services, or specific APIs
- batch integration : allows for mass data import/update. ETL tools are specifically used for this purpose.
I will briefly introduce the use of SSIS with Dynamics 365 in this post.
SSIS is the Microsoft ETL, and has quite powerfull features. It is a logical choice for customers who use Microsoft softwares.
The favorite way to do this is usually to use the KingswaySoft third party toolkit. Information can be found here. The product can be used free for development purposes, but needs a licence for real use on a server. It is actively maintained and widely used.
My example scenario is the following : uploading 1000 contacts from a Excel file to Dynamics 365.
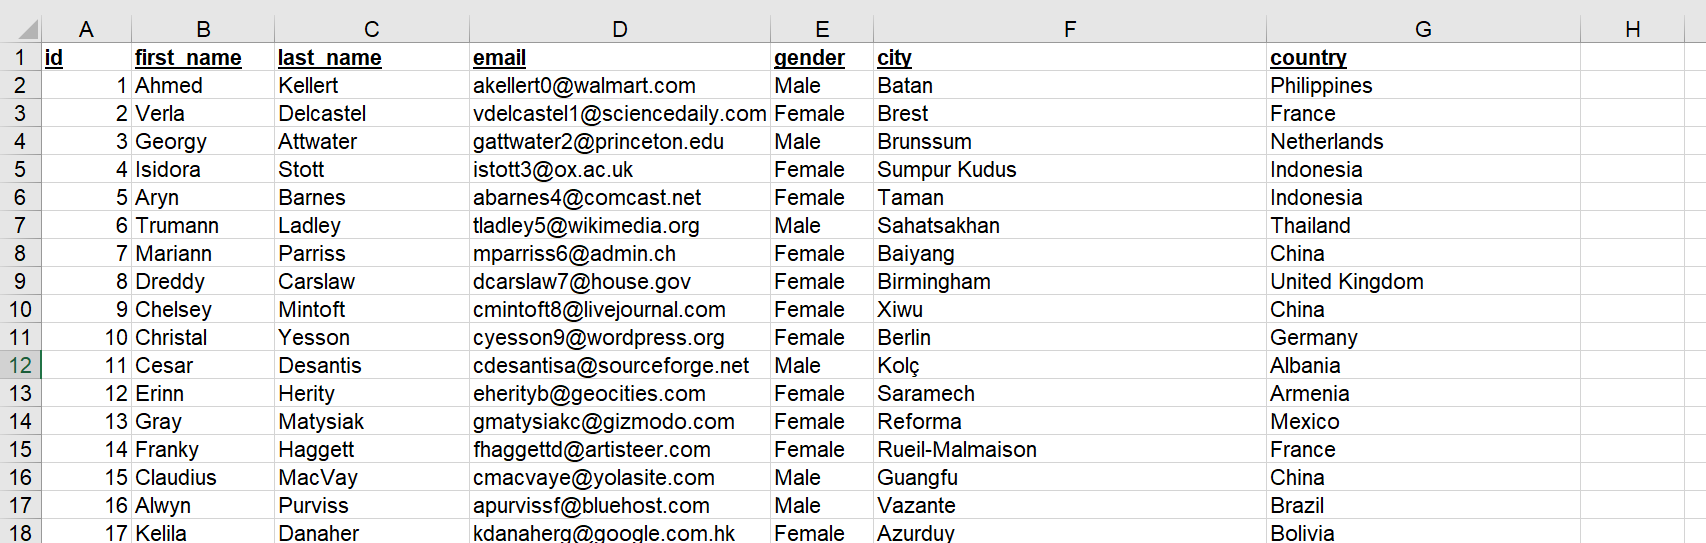
I previously installed the KingswaySoft toolkit, which added added some sources and destinations to SSIS development tool.
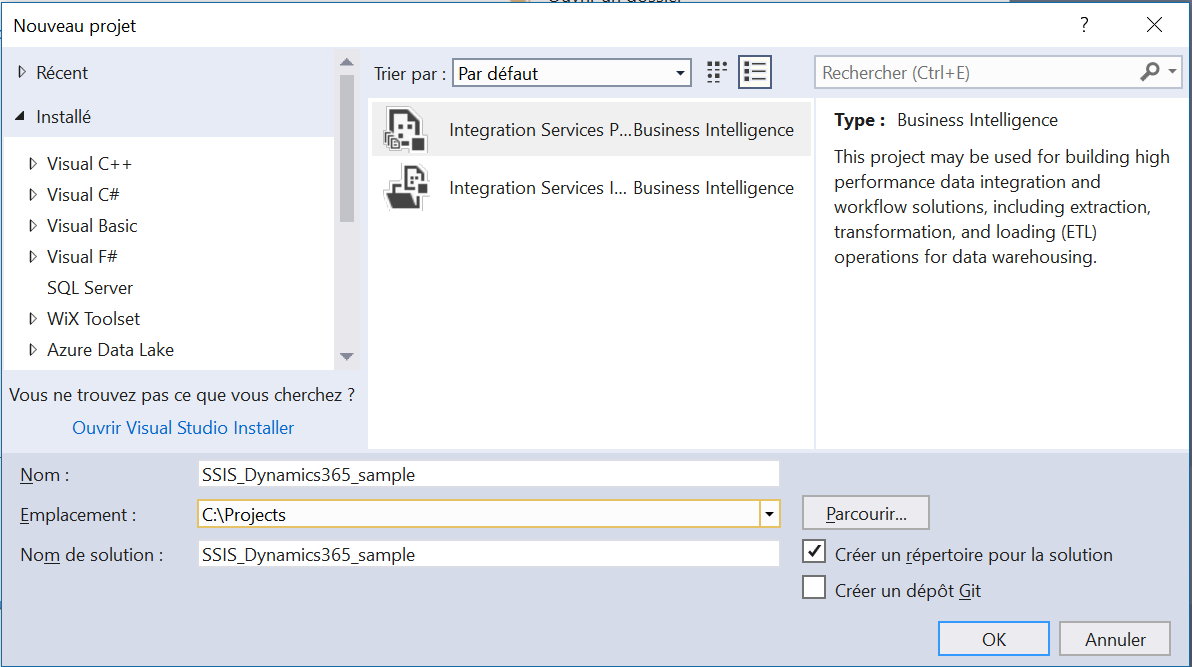
I start by creating a new SSIS project :
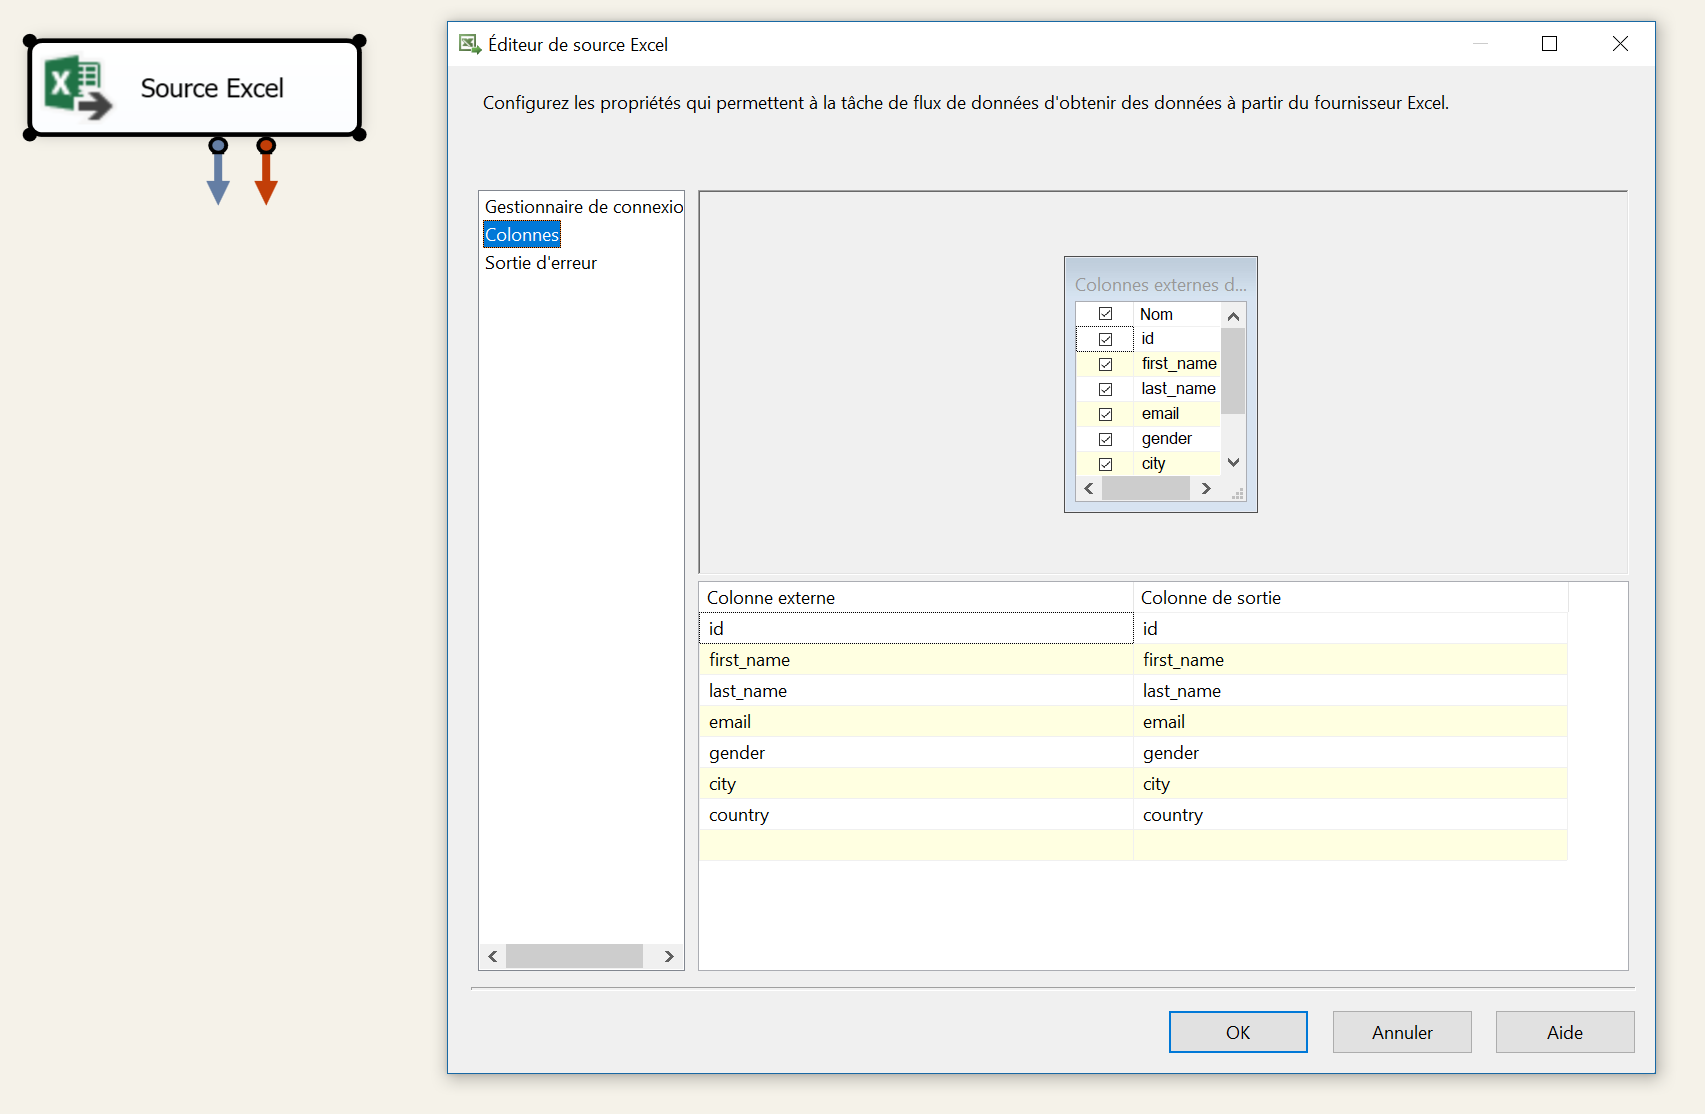
I create a new « Control Flow », add an Excel source and choose all columns to read :
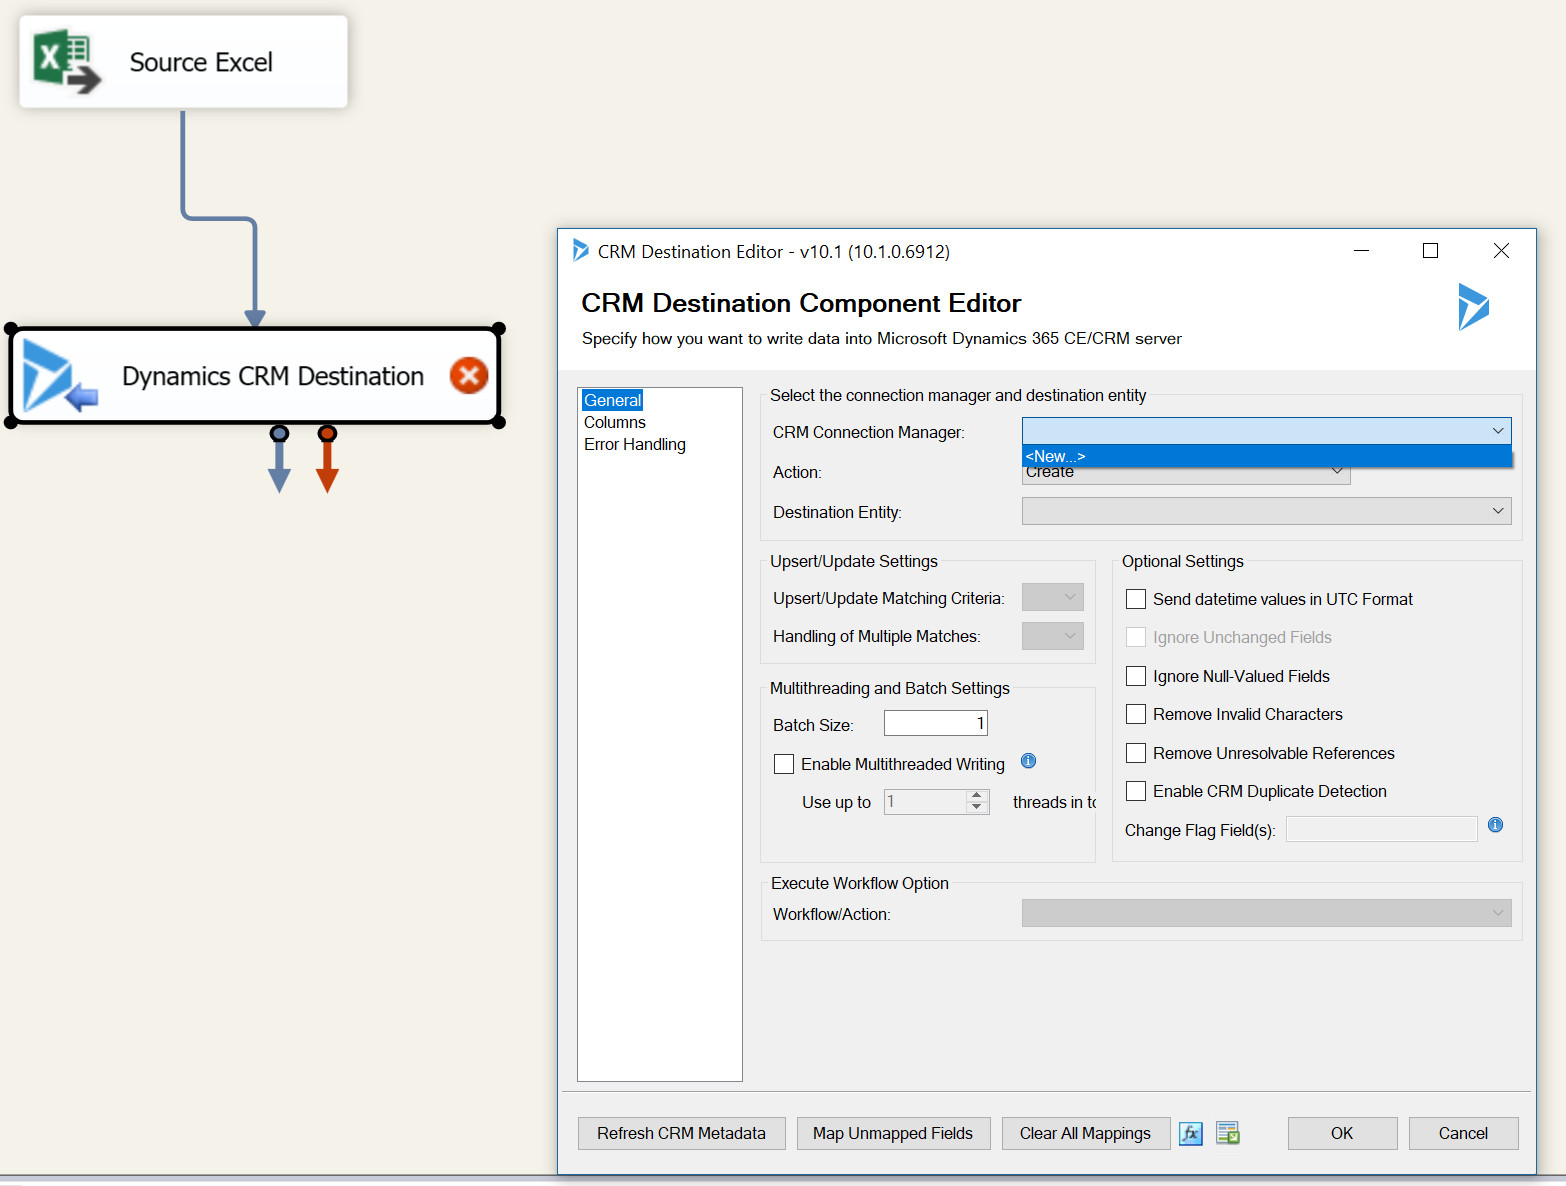
Then, I simply add a « Dynamics CRM Destination » to the control flow :

As you can see above, KingswaySoft toolkit added several sources and destinations for Dynamics CRM, NAV and AX.
We link the two components, double-click on the « Dynamics CRM Destination », and select « <New…> » in the « CRM Connection Manager » :
You need some informations from Dynamics to create the connexion. In your Web Dynamics application, go to Settings/Customization/Developer Resources :
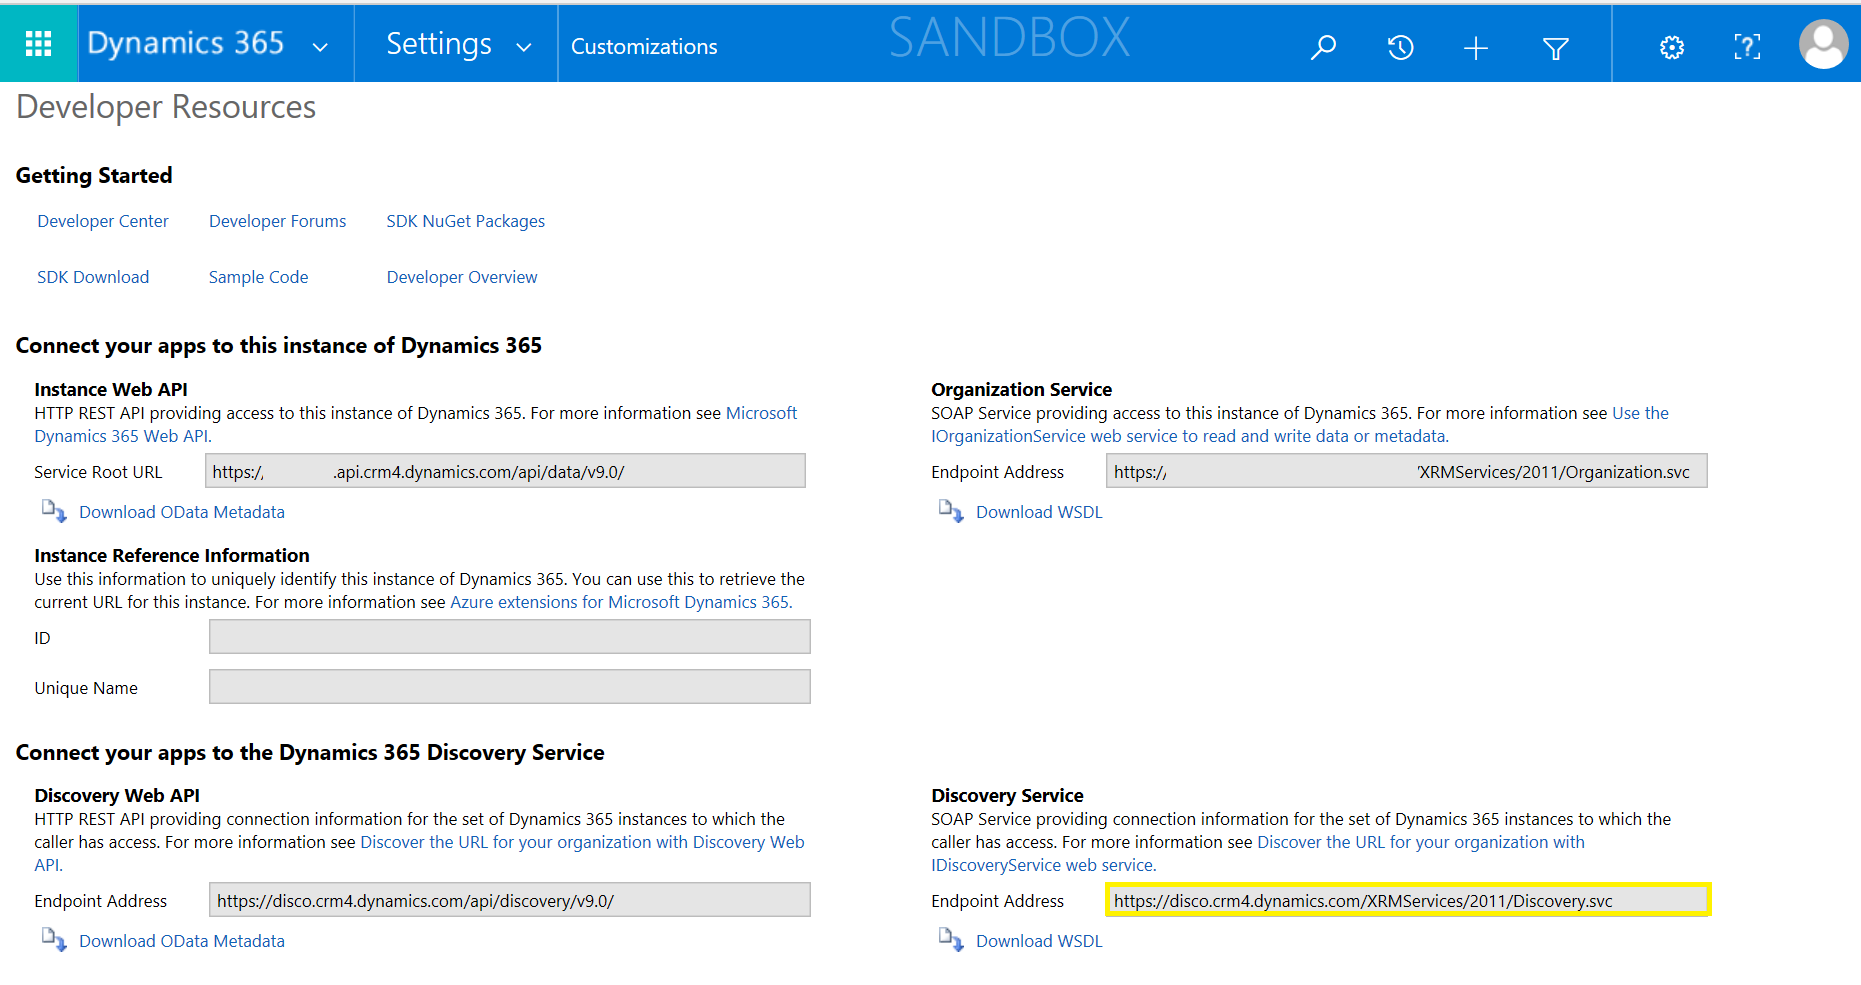
Look a the Discovery Service. What we need here is « disco.crm4.dynamics.com » (in my example).
Now, go back to SSIS, on fill the Dynamics connexion screen :
- Authentication Type : choose Online Federation
- CRM Discovery Server : choose the server you found above in Dynamics
- Fill the username and password for Dynamics 365
- Select the « Organization » that is suitable : in my example, I take a sandbox Dynamics environment
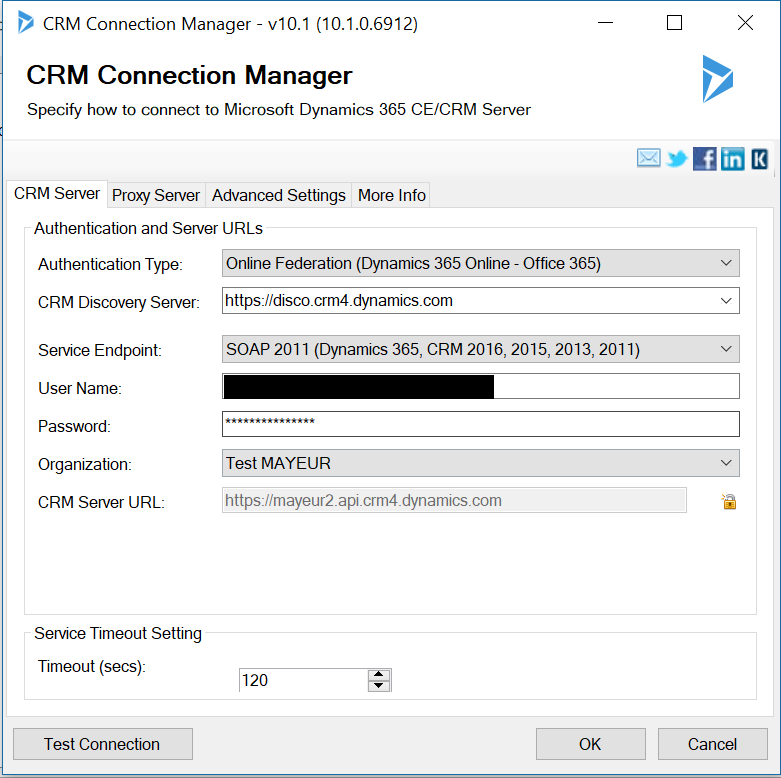
You can click « Test Connection » just to be sure all is OK.
Now, we define the mapping of data. In our simple example, we just insert new data with no transformation :
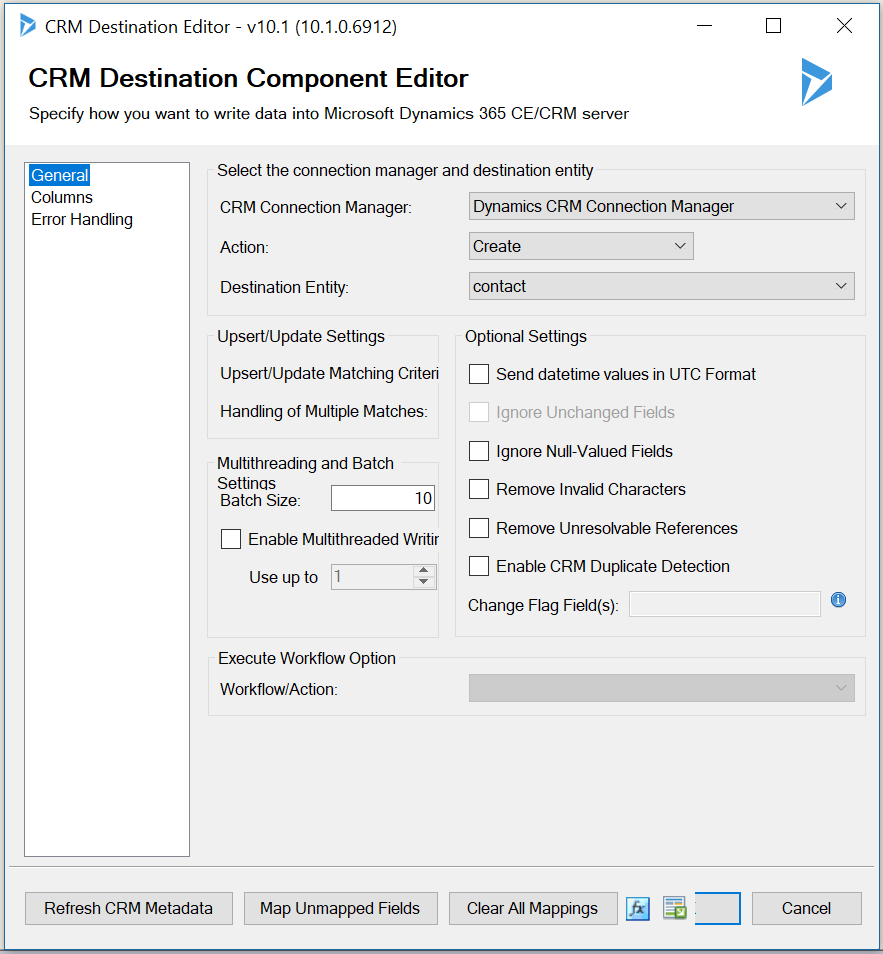
As you can see, many options are available, regarding functional capabilities (upsert, deduplication, workflows, …) and performance (batch size, multithreading).
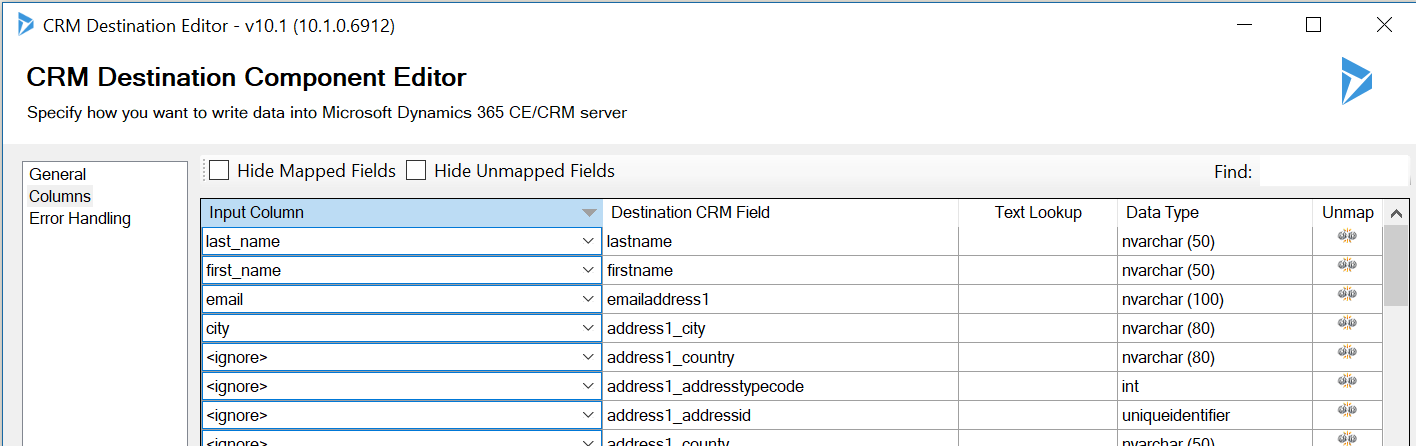
In the « Columns » tab, we define the real mapping. We do not care with coutry code, nor gender transcoding in the scope of this post, but this feature is quite easy to implement in SSIS, whether by a script component or a dedicated existing component.
That’s it!
Now executing the SSIS program. It works successfully… taking nearly 8 minutes… Quite a long time for 1000 contacts and a really simple flow of data. But many optimisation options exist, I work on a workstation with a poor Internet network quality today, and on a Dynamics sandbox with some restriction on the performance side. Performance tuning of SSIS Integraton could be a great post for the future!
Laisser un commentaire